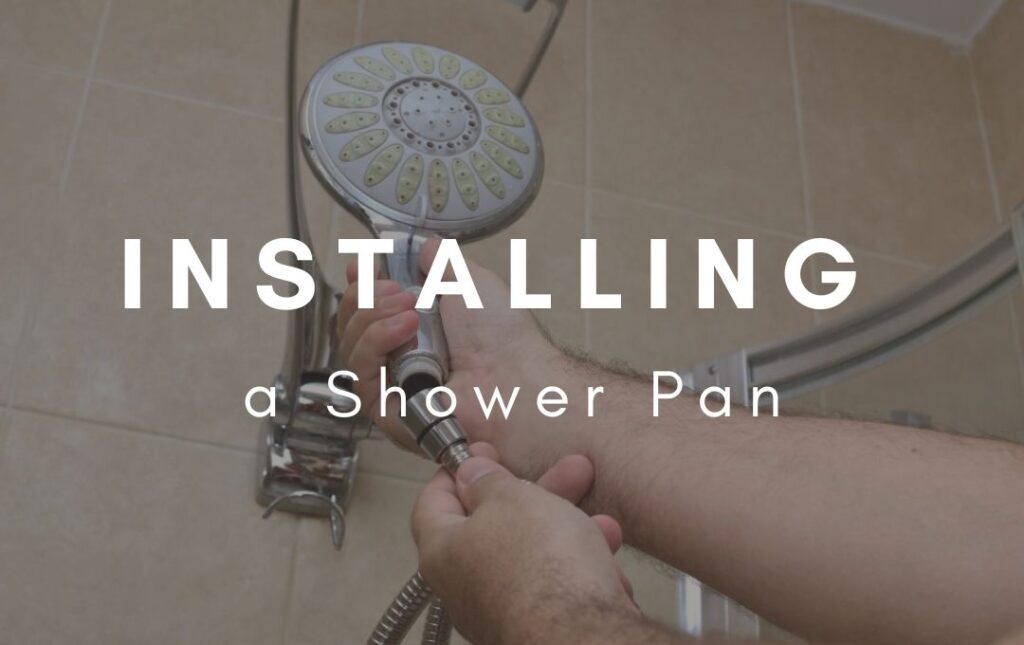
Installing a shower pan will not be difficult if you choose the model fits the place where it will be installed. When you buy a shower pan in Surrey, you must choose the one that will be easiest to mount.
 It is mainly about the height of the shower pan and the location of the drainage hole. Look at where the inlet is located in the bathroom and at what height. You can connect a small shower pan if the inlet to the sewage system is very low, just above the floor or even on the floor.
If the inlet is slightly higher, choose a higher shower tray, because only then will it be possible to ensure a pipe drop from the siphon to the sewage system. The fall is important because it determines whether the water from the shower tray will run off well.
The second issue is the location of the drain in the shower pan. Contrary to appearances, the small distance between the shower pan outflow and the inlet to the sewage system does not facilitate the connection, because it is difficult to fit the siphon and bend the pipe. It is better than the outflows are a bit distant to have space for a sewage connection.
The third issue is the choice of the siphon itself, which you usually have to buy separately. Choose a siphon cleaned from the top and as low as possible, especially if you plan to install a shallow shower pan.
How to arrange drain pipes in the bathroom?
Sewer pipes are laid in the floor or in a wall furrow with a minimum 2 percent drop. in the direction of the vertical. If the shower pan is far away from it, the difference between the place of joining the vertical and the siphon can be as much as 10 cm. It follows that the longer the approach, the higher the floor will be the bottom of the shower pan.
Prepare a place in the bathroom
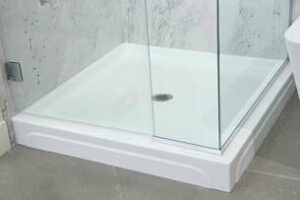
Before installing the shower pan, the walls and floor should be tiled. Make sure that waterproofing is done under the tiles (for example, from the liquid foil). This will prevent flooding of the neighbor or adjacent rooms when the silicone joints are unsealed and the water will leak into the shower pan. The inlet to the 50 mm diameter sewer should be placed under the shower tray, then you will not see the connection.
Installing a Shower Pan step by step
STEP 1 – Screwing feet
Mount the feet to the bottom of the shower pan. Earlier, measure the height of the panel and set the appropriate length of the legs, so that the panel fits under the shower tray. Do not remove the cover protecting the shower pan from scratches.
STEP 2 – Leveling the feet
After installing the feet, check the spirit level that all are equal. Level the bubble in different directions – along with the sides of the shower pan and diagonally.
STEP 3 – Screwing handles to the panel
Attach the side panel holders to the shower pan.
STEP 4 – Leveling the shower pan
Put the shower pan in the bathroom corner and check if it keeps level again. If necessary, adjust the height of the feet again. Try if the side panel fits – put it on the test and then take it off.
STEP 5 – Determining the place of the siphon
Using a pencil, mark the place of the tide on the floor. You set the siphon here.
STEP 6 – Connecting the siphon to the sewage system
The bottom part of the siphon should be connected with a flexible pipe with a sewage drain in the wall. Usually, the sewer drain has a diameter of 50 mm, the same diameter has the pipe. Remember to keep the slope towards the outflow.
STEP 7 – Adjusting the length of the pipe
When the pipe is too long, cut the tip with a metal ball. Cut the edges after cutting with a knife and sand with sandpaper. To facilitate joining, the ends of sewage pipes and gaskets should be lubricated with dishwashing liquid (it facilitates pressing and prevents the gaskets from curling up).
STEP 8 – Inserting the bottom seal
Place the gasket carefully on the lower part of the siphon.
STEP 9 – Setting the shower pan
Put the shower pan in the right place. Previously, you can apply silicone or assembly glue to the sides of the shower pan and thereby stick the shower pan to the wall.
STEP 10 – Twisting the siphon
Insert the upper part of the siphon into the drain opening and screw it into the bottom part previously connected to the sewage system. Remember about the correct order in which the seals are installed (this depends on the type of siphon). Be careful not to twist any gasket when screwing, because then the siphon will leak. Insert the remaining part of the siphon and the upper lid. Now you can remove the protective foil from the shower pan.
STEP 11 – Leak test
Fill the siphon with water and check if you have turned the drain well and connected the pipes. If the floor under the shower pan is dry, you can continue the work.
STEP 12 – Sticking feet
Glue the shower pan feet to the floor so that the paddling pool does not move during use. Apply silicone from the cartouche around the feet and rub with your finger.
STEP 13 – Installing the panel
Push in the side panel of the shower pan.
STEP 14 – Preparation for siliconizing
Wipe dry and cover with painting tape the edges of the shower pan adhering to the walls and the edges of the side panel adjacent to the walls and to the floor.
STEP 15 – Silicate
Fill the slits with silicone. Squeeze the silicone out of the cartridge along the entire length of the slot, then form the joint with a rubber pack or finger.
STEP 16 – Removing the tape
Peel off the masking tape as soon as the silicone is wet.
STEP 17 – Silicon drying
Do not use the shower pan for 24 hours until the silicone dries and binds. Then you can mount the cabin.
Remember to take care of the shower pan tightness
It is very important to seal the bathroom floor and walls in the cabin and around it. If you do not take care of it, water can get to the deeper layers of the floor, destroy the ceiling structure, and lead to moisture in the walls. The result is the appearance of fungi and mold. The waterproofing is best done with liquid foil.